Showing posts with label Quilting. Show all posts

Sunday, 6 February 2022

New Beginnings


 My Website is Live!


You can continue to follow my quilting adventures by visiting www.thatssewkerry.com I have loved sharing my journey with you here and really hope you'll join me over on my new website.

Happy Quilting
Kerry x

Sunday, 27 December 2020

KEEPING DOLLY COZY

Quilted Sleeping Bag


Quilted Sleeping Bag Tutorial:

1.When your baby sister asks Santa for 'blankets for Dolly' you do what you can to help the big guy out! There are several ways this can be done, this is simply the way I made them and thought you may find it useful if you have small people who also want to keep their Dolly warm.


Cutting:

All squares are 2.5 inches the amount you need will vary depending on the dimensions of the doll you are making for. Dolly is 18 inches tall and is similar to the American Girl type dolls so the below is what I needed to accommodate her size and dimensions.

Front Panel
56 squares for top
Binding (1) 2.5" x 15"
Backing (1) 18" x 16"
Wadding (1) 18" x 16"

Back Panel
77 squares for top
Binding (1) 2.5" x 75"
Backing (1) 24" x 16"
Wadding (1) 24" x 16"


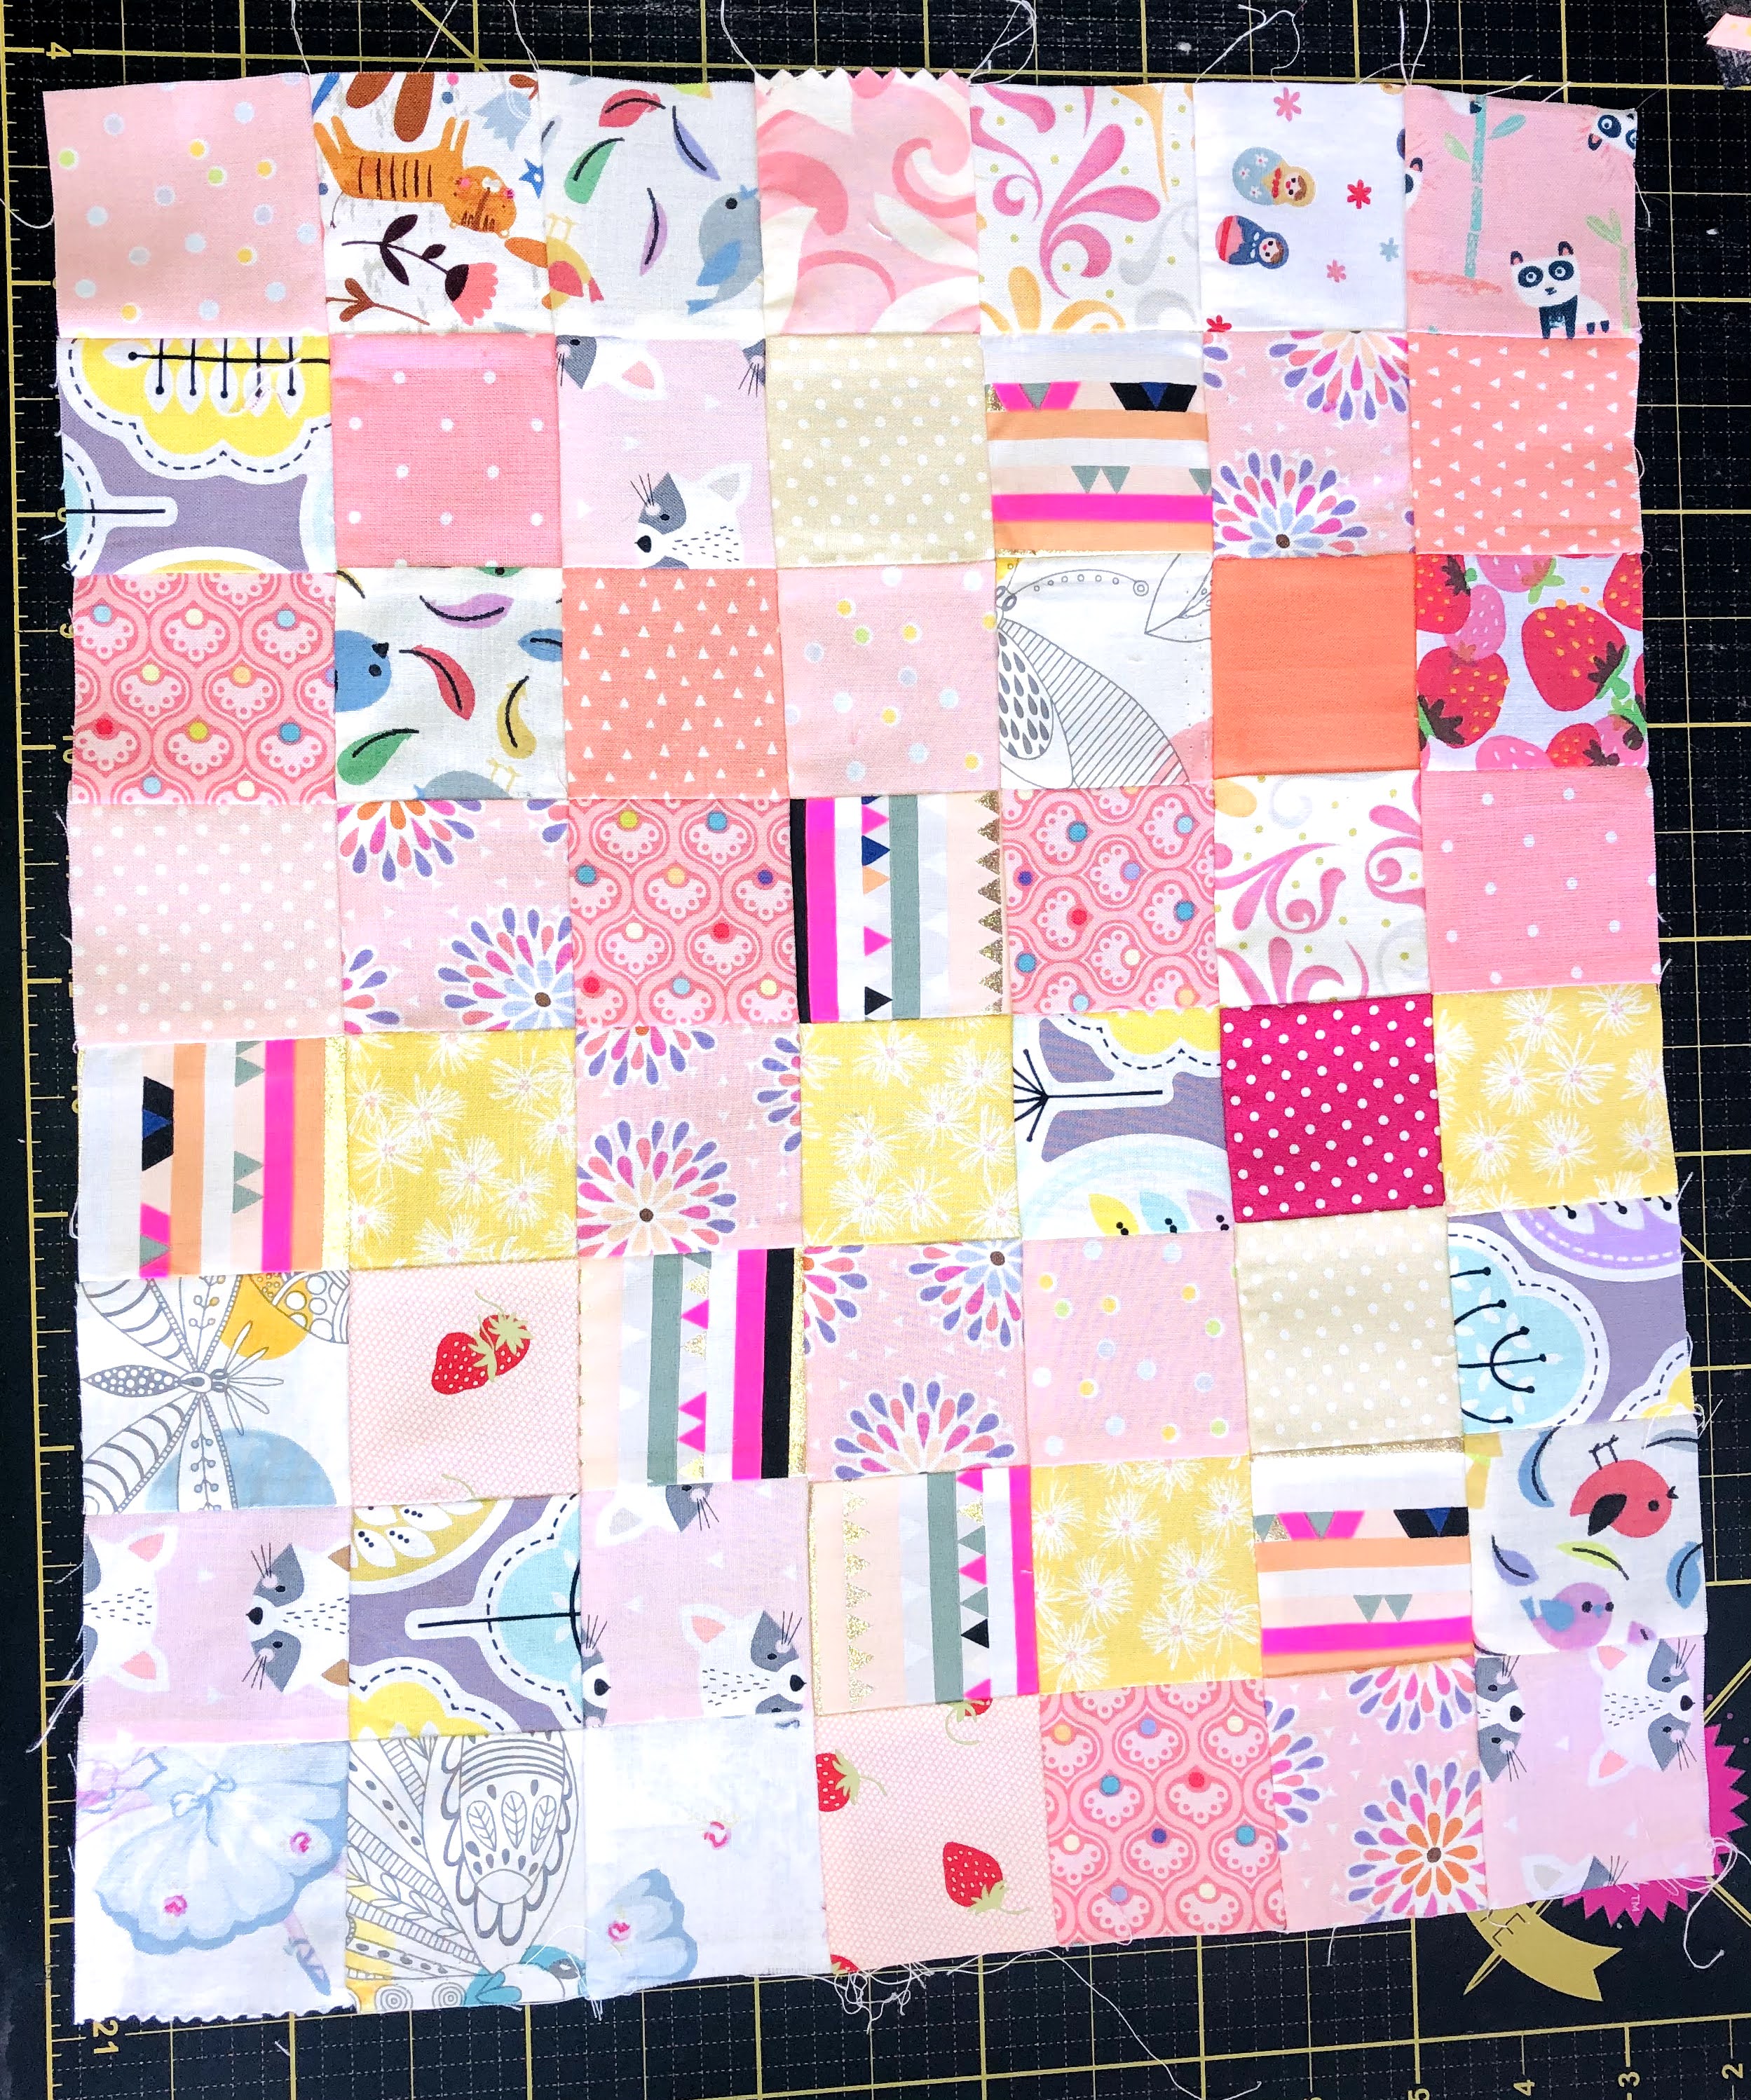
I wanted a scrappy look to mine so I raided my stash and found fabrics I knew the small person would like and would be appropriate for Dolly. You can literally use anything to make these.


Assembly:


1. Sew the squares together using a quarter inch seam, I alternate pressing my seams to the left or right for each row which makes it easier to nest my seams. You can use whichever method you prefer.


2. If you are using 2.5" squares and making the same size I am, your Front Panel should measure 16" x 14" once the rows (I did 7 rows by 8) have been sewn together. The Back Panel should measure 22" x 14" once the rows (I did 11 rows by 7) have been sewn together.


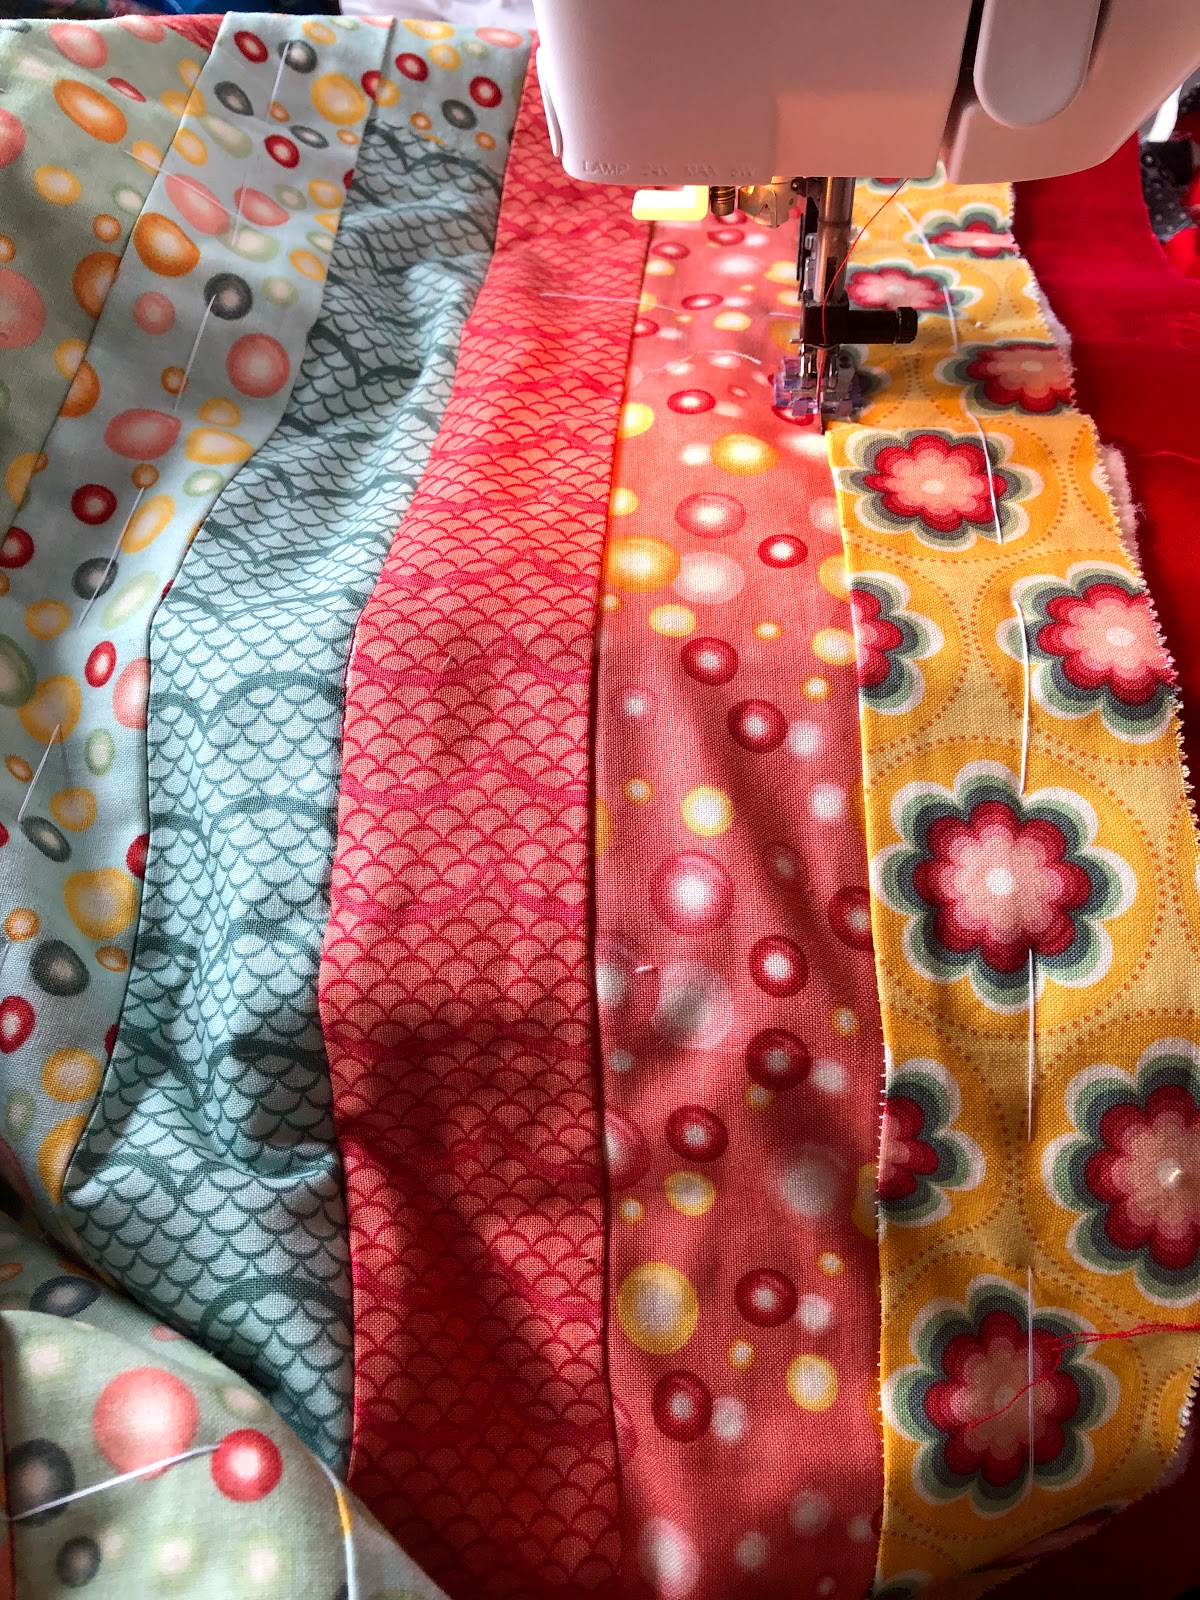
3. Layer the Front Panel with the wadding and backing and quilt as desired. Repeat for the Back Panel. 
Personally I use pins and NOT glue to baste as it gets stuck in the needle and machine parts - obviously use whichever method you prefer.


I kept my quilting simple by doing straight lines on either side of each seam line, keeping them 1/4 inch apart by using my 1/4 inch foot. There is a mini tutorial on this in my Instagram Guides.


4. Trim down the Front Panel to your desired finished size, for me this was 16" x 14", using the binding strip 2.5" x 15" bind one short edge of this panel leaving 1/2" hanging over each side.


Putting the sleeping bag together:


1. Trim down the Back Panel to your desired size, for me this was 22" x 14" and then place it right side DOWN so your patchwork/top will be against your worksurface. Place the Front Panel right side UP on top of the Back Panel.


2. Match up the bottom corners on both panels and pin in place. 


3. At this stage you can either sew an 1/8" stich line around the whole of the sleeping bag to hold the panels together and then bind as normal OR as I did, pin the panels in place and go straight to binding them together.

Both methods work in the same way, so it makes no difference how you finish off this step, it depends how confident you feel.


Repeat to make as many sleeping bags for Dolly as needed! 

If you need any help working out sizes or number of squares for a different doll, please get in touch and I'll do my best to help you.


Monday, 23 March 2020

WHY DO YOU QUILT?

A Question Often Asked


I've had this post rattling around in my head for a while, something has always stopped me writing it, I'm not sure what really but now in the midst of 'isewlation' due to this horrid Coronavirus outbreak it seems like a good time to finally get it out. For those of you that have read the dreaded 'C' word and immediately got put off - it is the only time it appears here.


What on earth are you doing? What's the point in cutting up perfectly good pieces of fabric into smaller pieces and sewing it back together? Why do you even want to do that?

Honest questions that I get asked all the time, mostly on holiday or on the train when I am desperately trying to grow my EPP project that should have been finished in May 2019:


Questions that are usually followed by 'oooh I just wouldn't have the patience'. Historically quilting was far more utilitarian born out of a need to keep warm at night but with little resource and scare supplies, so any small piece of fabric that could be used, was added to another until larger pieces were made and then turned into quilts. Nowadays though for a lot of people, this isn't the case, blankets can be bought in all forms and fabric is available in abundance - so why do we quilt?

I've long been of the opinion that buying fabric and making anything out of it, in my case quilts, are two entirely separate hobbies, unfortunately my poor husband is still very much in denial about this - the fabric collecting is something I will have to tackle in another post, #tulapink is all I can say!

I thoroughly enjoy the whole process of selecting a quilt block or pattern based on who I'm making it for or why I'm making it, choosing fabrics and colours that bring the quilt to life and then there is the making process - watching as each little section gets bigger and starts to take shape, eventually becoming a completed quilt top.


I've made all sorts of quilts from lap size to king size, machine pieced, paper pieced (my fav!), group quilts, baby quilts, wedding quilts and everything in between. I'm also lucky enough to have made several custom quilts and commissions, something I am very proud of and continue to do.

There are lots of creative things I could do though, so why do I make quilts? It's simple really - to combat loneliness, by somehow feeling connected to like minded and other fabric loving people like me.

I moved to the UK when I was 13 years old, I left my friends, my culture, the sunshine and everything I'd ever known on the other side of the world in South Africa, a severe shock to the system is an understatement. I started school in September 1998 in Year 9 - another severe shock to the system, where I'm from it's quite common to go to Nursery then move to Primary School and then to Secondary School without the people in your class, however when I moved here I learnt that more often than not everyone goes to the same Nursery then to the same Primary School etc so by the time I joined in Year 9 at the age of 13, many had already been together for a very long time. 

It wasn't that people were necessarily unfriendly but it was very apparent that they already had their friends and on top of that I was different, I spoke funny, I didn't know about the popular things or have the right sized waistline or celebrity crushes - PJ and Duncan could have been a takeaway place for all I knew, so it was both a daunting and lonely time.


My best friend lives on the other side of the world, she always has, thankfully we're both able to travel (as I am writing this draft I'm sitting in the glorious sunshine in her beautiful garden) and use WhatsApp, Facebook etc now but it's not the same, she's my person and I miss her everyday. We speak all the time but it is still very lonely, I've always felt lonely so I guess I was looking for something that would help me notice her absence a little less. 

I've long believed that any form of craft or doing something that makes you happy, is great for ones well-being and mental health and I think that this is even more important in today's society where so many people have forgotten how to simply be kind to each other.

I started my quilting journey by doing a beginners class where I met some fantastic ladies, a few of us went on to do a slightly more advanced course where we met a couple more and the five of us are still firm friends, meeting once a month for our own stitch and bitch. We even have our own mini retreats where we rent a beautiful cottage somewhere in the country - usually in the vicinity of at least one quilting shop and have a 'sew in' for four days, we've had three so far, this year marks our 8th as a completely mad bunch of quilting friends, we were a group of six but sadly we lost our friend Sue a few years ago.

These wonderful women who I am very proud to call my friends are so inspirational, I've learnt so much from them and continue to do so, they are supportive and encouraging and I honestly wouldn't be half the quilter I am today if it hadn't been for them.


Image result for why we quilt


So why do I quilt?

Because it feeds my soul, I love creating, I love learning and I enjoy spending time with like minded people, who despite what life might throw up enjoy making beautiful things to reflect their joy and colour. There are so many great books out there dedicated to why people quilt, looking at all aspects across many histories and I have read many of them, but most recently Thomas Knauer released Why We Quilt and I honestly couldn't put it down - cover to cover it is fantastic, the images are beautiful and each story is so wonderfully unique that each person who reads this book will relate to something in it.

So that's my story, that's why I love to quilt, if you'd like to share your story please do get in touch. You can see all my quilting adventures in pictorial from on Instagram @thatssewkerry 

Happy Quilting
Kerry xx 

Tuesday, 20 August 2019

SCRAP BUSTING

No Scrap Left Behind


This is something I actually started quite a while ago, the center or main body of the quilt is a simple Jelly Roll quilt but is a very effective and rather quick way to rustle up a fairly decent sized quilt in a couple of hours.

You will need a full Jelly Roll, unroll it and layout all the pairs of colours/prints so you can easily see what you've got to work with. Then sew every strip end to end so you have one extremely long, continuous length of fabric measuring 2.5" wide. Fold in half along the 'short' edge and sew all the way down one long(very long) side. Cut the short edge open along the fold so you can now open out your sewn jelly roll and lay it flat - it should now measure 4.5" wide. Repeat until your have reached your desired quilt top size/width.


It's dawned on me as I'm writing this that more pictures probably would have been useful - so I'll try to get a tutorial up here soon.

But back to Scrappy business and those border blocks. They are based on the concept of 15 Minutes of Play a brilliant idea by the fabulous Victoria Findlay Wolfe, she actually has an entire blog dedicated to it. 


It really is a great concept that is quick an easy, the results are practically instantaneous - something I particularly like! The idea is you start with a 5 sided shape, the wonkier the better, and then you add to each side almost in a Log Cabin style, growing your block one scrap at a time.

The starting shape doesn't always have to have 5 sides, as you can see from mine they all varied and each one took on a life of its own. 


No scrap was left behind, no matter how small! I found that this made the shapes, fabrics and colours far more interesting and really highlighted the 'scrappiness' of them.


I made 44 blocks in total all measuring 6.5" square for the borders of this quilt, then sewed them together in strips - 2 with 10 blocks each and 2 with 12 blocks each and attached them to each side making a happy scrappy border.


I then had the monstrous task of attaching the binding and finishing it off by hand, I wouldn't go as far as saying I enjoyed it but there does reach a point with sewing binding that becomes quite therapeutic.

This quilt was a present for my Gramps who turned 80 on Sunday, the scrappy blocks were made from fabric used in every quilt I've ever made for our family members, so he always has a piece of us with him.

If you follow me on Instagram you'll see a few more pictures of this quilt, along with all the other things I'm currently working on.

Feel free to get in touch, it's always lovely to hear from you all.

Happy Quilting
Kerry xx

Sunday, 11 August 2019

TIME FLIES

12 Months On

I can't believe it's been over a year since I last wrote a blog post! I was walking around Festival of Quilts a little over a week ago thinking it's been a good few months since I've blogged and I quite miss it, only to log on and realize it's actually been more than a year  - how time flies!

So much has happened since my last post it'll take all day to catch you up but in brief we got the dream house and said room is filled to bursting with fabric, we got married 6 weeks ago - can't say it's quite sunk in yet but I'm loving wife life,we've got 2 little fur babies keeping us very busy and 30 sleeps until honeymoon! And in between all of that I've been quilting up a storm.


There were so many gorgeous quilts on display at FOQ this year I couldn't possibly pick 1 favourite but this one really was so beautiful to see in real life  - it was huge! I don't do a great deal in solids, I'd really like to get better at that and actually have a few things in the pipeline that are going to be predominantly solid based, but I am such a sucker for a good print, especially if it can be fussy cut!


Everything about this quilt was just gorgeous, the actual quilting of it was breath taking and certainly something to aspire to. It's one of the many things on my list to practice and improve on, I'm good at free motion embroidery and have got years of experience in doing that, I just need to get my act together and modify those skills to use in a quilting capacity - she says.

There were as always far to many quilts to take photos of and inspect as closely as I would have liked - I'm seriously considering going for 2 days next year, but here are a few that caught my eye.


A whole range of styles and techniques, some of which I have tried and continue to use and some that I've only admired from a far but are definitely on my wish 'to do' list. I liked all of these for different reasons, colours, shapes, design they all offered something unique and were all so very different. I'm considering entering something in next years show, I might start smaller though with a more local show maybe to build up my confidence as this would be completely new to me.

When the Aves Quilt was all the rage I signed up to that and have all the patterns for it, they are all beautifully saved in a folder on my computer and that's as far as i got with it. I've followed a few people on Instagram who have been religiously sticking to the block a week program and some of them are really good, but this one at festival was on a whole other level! Not only is the quilt gorgeous as it is, but the secondary pattern of the kingfisher is just something else.


Breathtaking right? 

Those of you who are familiar with my work and me will know that I have a serious problem when it comes to fabric, I didn't disappoint at Festival and my usual trick of saving from the very next day in my special Festival only pot worked a treat again! I bought far to much to list in this post but will definitely be referring to those purchases in future posts - and yes I'm going to work really hard to make sure there are more frequent posts - this year!  

I hope you've enjoyed hearing from me again and if you're new thank you for stopping by, I hope you will do so again.

Happy Quilting
Kerry xx

Wednesday, 4 July 2018

UPDATING TUTORIALS

CAPITAL 'T'


Capital T Block Tutorial

18" finished block
All seams are a scant 1/4” unless otherwise noted

Cutting:
Background Fabric
(1) 6 1/2"
(1) 6-7/8" x 13-3/4"
(8) 3-1/2" x 6-1/2" 

Feature Fabric

(1) 6-7/8" x 13-3/4" 
(16)3-1/2"

Assembly:

This block is put together in two simple units: A and B

Unit A

1. Place the two 6 7/8" x 13 3/4" rectangles with right sides together, lightest of the two fabrics on top. Lightly draw a straight line 6 7/8" from the short edge dividing the rectangle in half and forming two squares. Then draw two diagonal lines through the center of the two squares, sew a 1/4" away from the diagonal line on both sides.


2. Cut the rectangles apart on the drawn lines creating four half square triangle components. Press the seams to the lighter fabric. The finished units should measure 6 1/2".


Unit B

1. Lightly mark a line from one corner to the opposite corner on the wrong side of the sixteen 3 1/2" squares of the feature fabric.

2. Take a 3 1/2" feature square and place it, right sides together, on top of one of the 3 1/2" x 6 1/2" background fabric rectangle matching edges and making sure that the diagonal line runs as shown. Sew on the marked line. Repeat with the remaining seven 3 1/2" x 6 1/2" background rectangles and seven more of the 3 1/2" marked squares.

3. Cut 1/4" away from the sewn line as shown. Press the seam toward the focus fabric.


4. Take the remaining eight 3 1/2" feature fabric squares and place them on the units created in Step 3, right sides together, so that the marked diagonal line is as shown. Sew on the line.


5.  Cut 1/4" away from the sewn line as shown. Press the seam toward the feature fabric. One "geese" unit is completed. This unit should measure 3 1/2" x 6 1/2".


Putting The Block Together:

1. Join two of the geese units (B) created together as shown. Press seam away from the point of the geese. Repeat with the remaining six geese units to create a total of four new units. These units should measure 6 1/2" square.


2. Join the top and bottom Block rows by piecing two right triangle squares with one of the geese units as shown. Press seams toward the right triangle squares.


3. Create the middle row of the block by joining the last two geese units with the remaining 6 1/2" background square. Complete the Capital T Block by joining the three rows as shown. 


The complete quilt Block should measure 18 1/2" square which includes a 1/4" seam allowance on all sides.