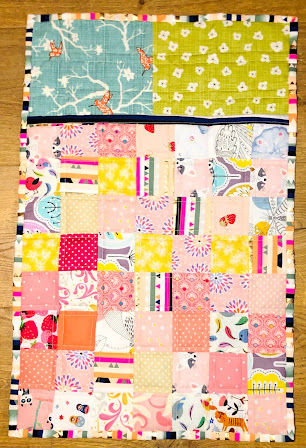
Quilted Sleeping Bag
Quilted Sleeping Bag Tutorial:
1.When your baby sister asks Santa for 'blankets for Dolly' you do what you can to help the big guy out! There are several ways this can be done, this is simply the way I made them and thought you may find it useful if you have small people who also want to keep their Dolly warm.
Cutting:
All squares are 2.5 inches the amount you need will vary depending on the dimensions of the doll you are making for. Dolly is 18 inches tall and is similar to the American Girl type dolls so the below is what I needed to accommodate her size and dimensions.
Front Panel
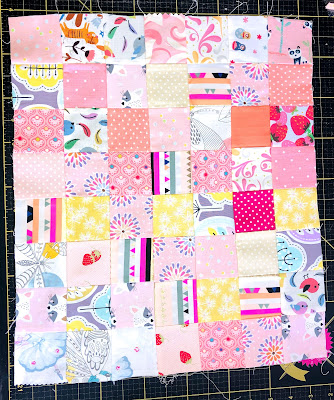
56 squares for top
Binding (1) 2.5" x 15"
Backing (1) 18" x 16"
Wadding (1) 18" x 16"
Back Panel
77 squares for top
Binding (1) 2.5" x 75"
Backing (1) 24" x 16"
Wadding (1) 24" x 16"
Assembly:
1. Sew the squares together using a quarter inch seam, I alternate pressing my seams to the left or right for each row which makes it easier to nest my seams. You can use whichever method you prefer.
2. If you are using 2.5" squares and making the same size I am, your Front Panel should measure 16" x 14" once the rows (I did 7 rows by 8) have been sewn together. The Back Panel should measure 22" x 14" once the rows (I did 11 rows by 7) have been sewn together.
3. Layer the Front Panel with the wadding and backing and quilt as desired. Repeat for the Back Panel.
Personally I use pins and NOT glue to baste as it gets stuck in the needle and machine parts - obviously use whichever method you prefer.
I kept my quilting simple by doing straight lines on either side of each seam line, keeping them 1/4 inch apart by using my 1/4 inch foot. There is a mini tutorial on this in my Instagram Guides.
4. Trim down the Front Panel to your desired finished size, for me this was 16" x 14", using the binding strip 2.5" x 15" bind one short edge of this panel leaving 1/2" hanging over each side.
Putting the sleeping bag together:
2. Match up the bottom corners on both panels and pin in place.
3. At this stage you can either sew an 1/8" stich line around the whole of the sleeping bag to hold the panels together and then bind as normal OR as I did, pin the panels in place and go straight to binding them together.
Both methods work in the same way, so it makes no difference how you finish off this step, it depends how confident you feel.
Repeat to make as many sleeping bags for Dolly as needed!
If you need any help working out sizes or number of squares for a different doll, please get in touch and I'll do my best to help you.


No comments:
Post a Comment