Showing posts with label Online. Show all posts

Tuesday, 21 July 2020

DISAPPEARING ACT


Disappearing Nine Patch 


Disappearing Nine Patch Tutorial


These blocks work really well if there is a contrast in the colours and fabrics you choose, ideally you want to have light, medium and dark fabrics. It's ok if you don't though as it's perfect for scrap busting.


Cutting:


Square size can vary depending on the size of block and/or finished quilt you want - as long as all squares are the same size it doesn't matter. For the purpose of this tutorial, I used a couple of charm packs so my squares are 5 inches.

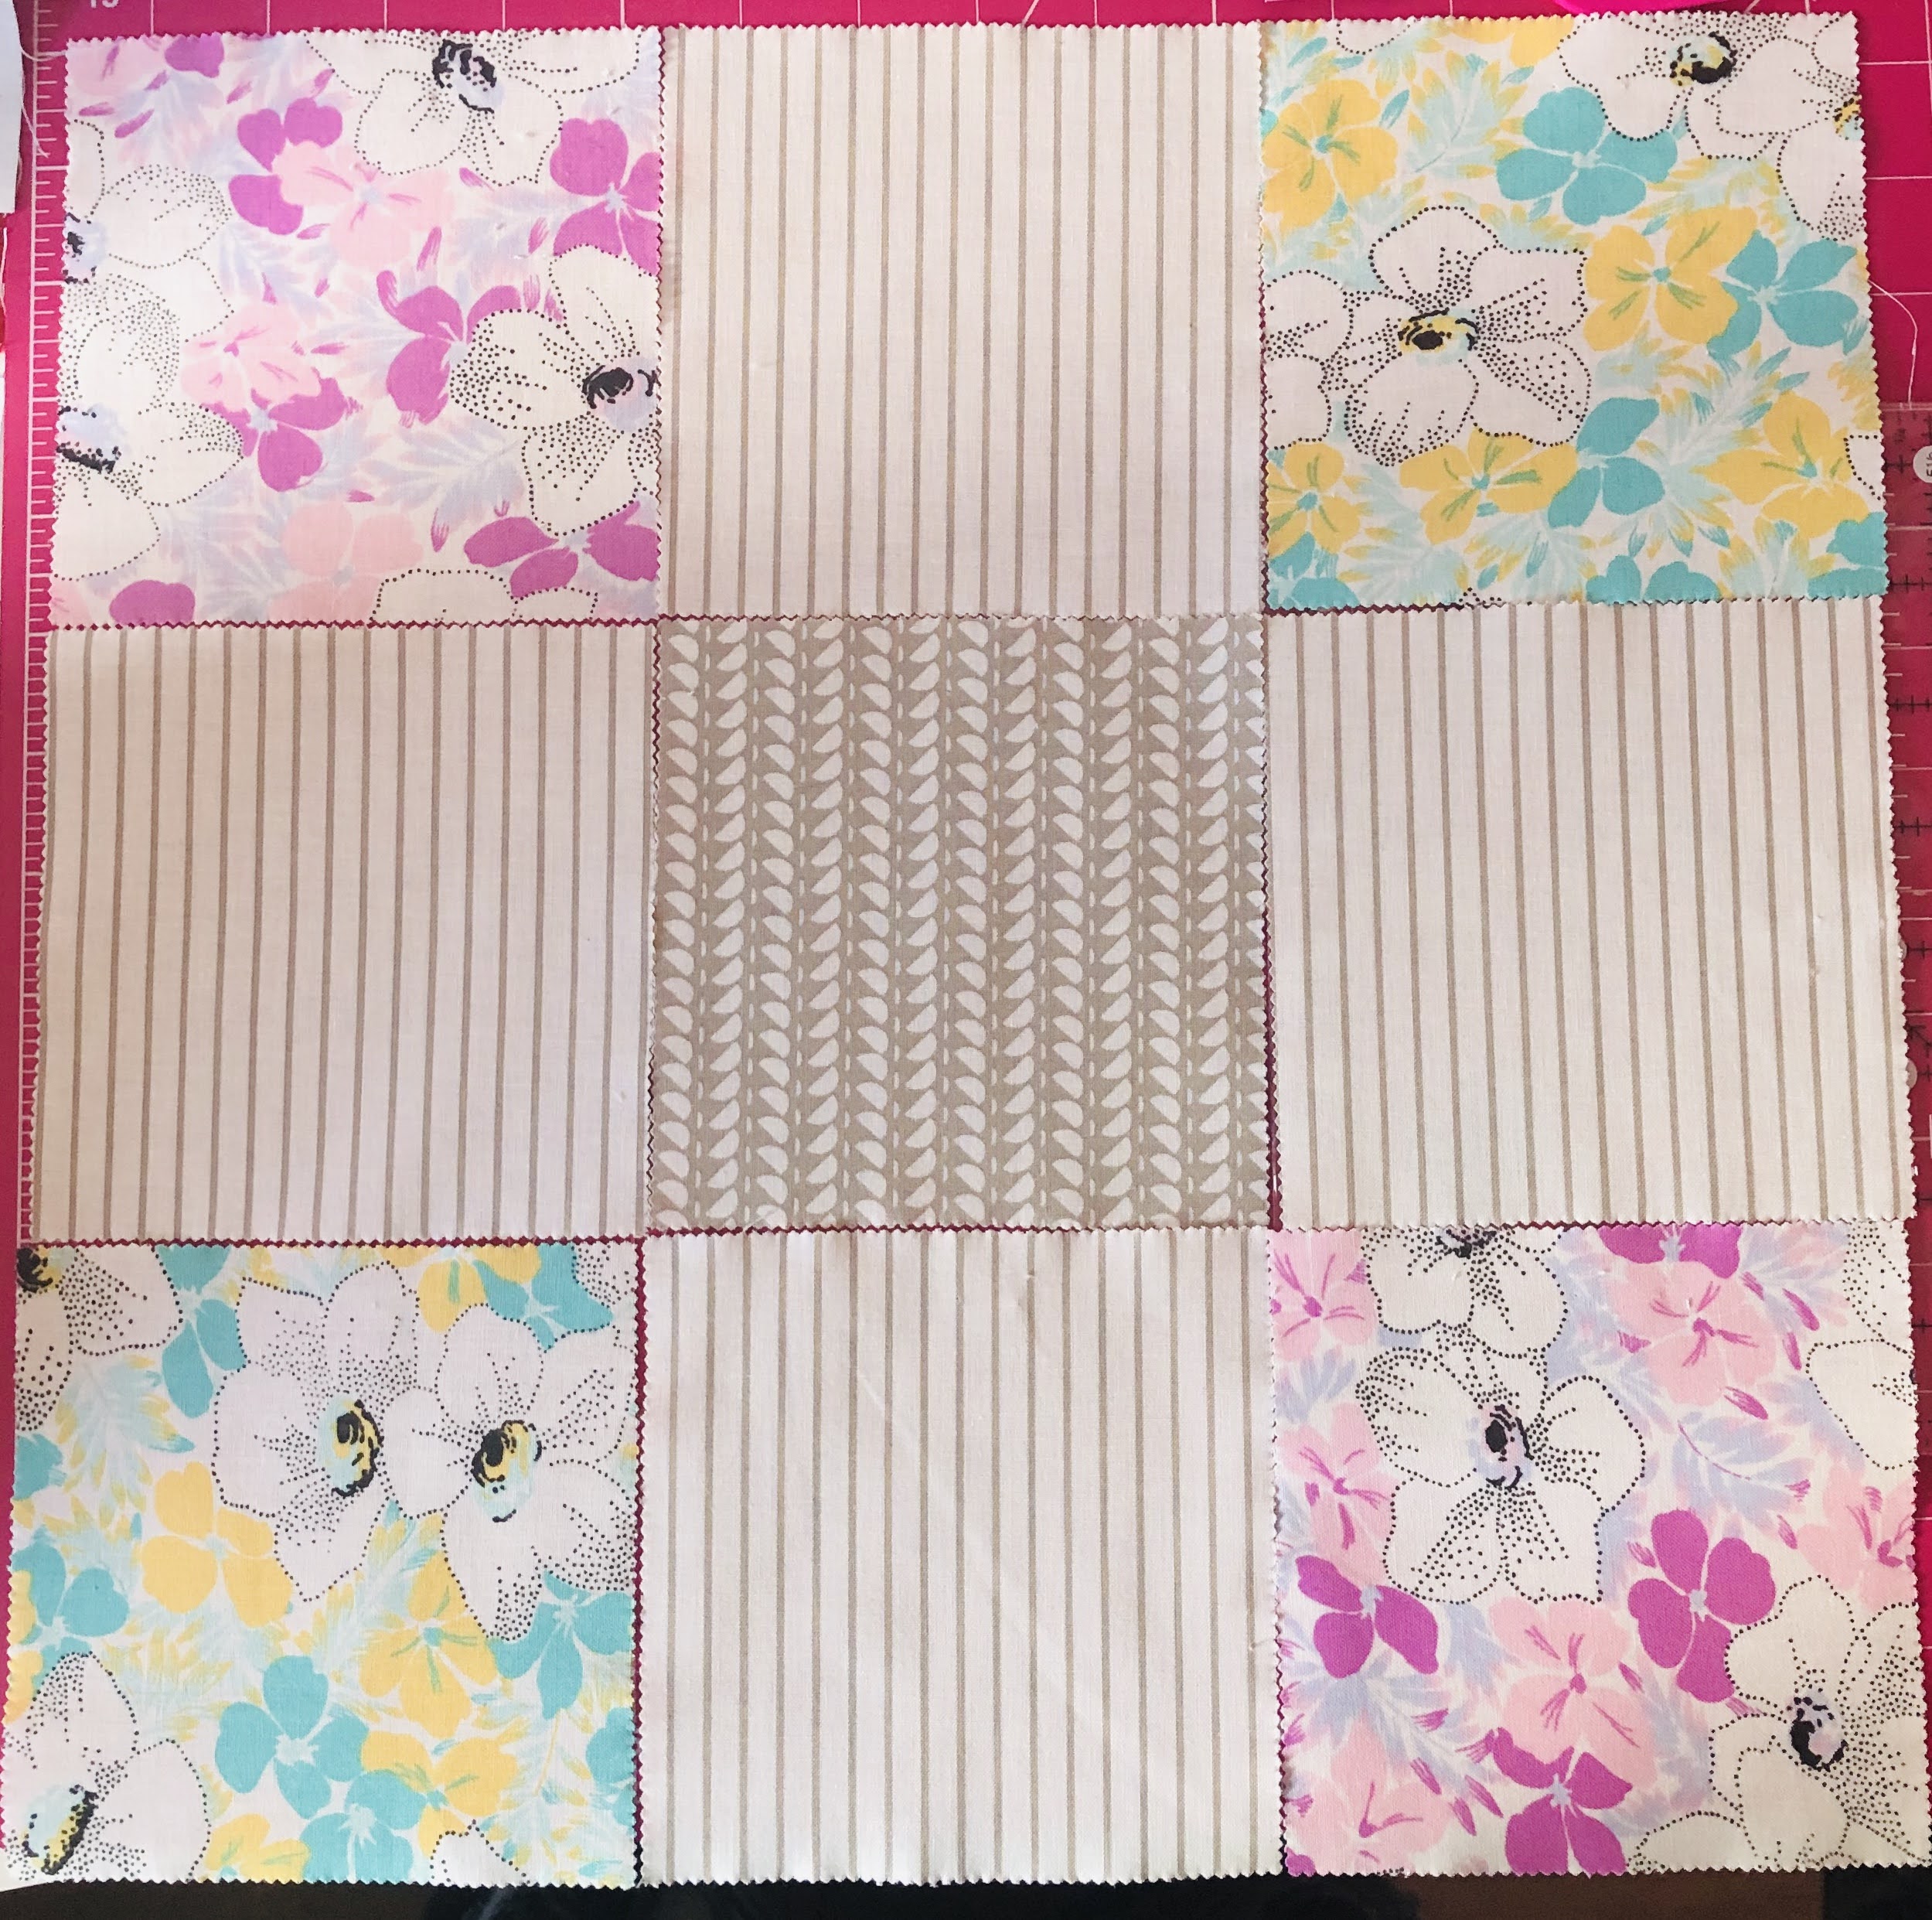
Cut 9 squares, each 5" x 5"

  • (1) dark
  • (4) medium
  • (4) light


    Arrange the squares into three rows with three squares in each. Place the dark square in the block's centre position. Place the your feature fabric squares (medium) or those you wish to highlight in the block's four corners. Fill in the gaps with the remaining squares (light).


Assembly:


1. Sew the squares together using a quarter inch seam, I press my seams to the dark side, but you can do whatever you prefer, I also like to nest my seams so they lay flatter and line up perfectly.


2. If you are using 5" squares your block should measure 14" square when once the rows have been sewn together. You're then going to cut this in half vertically, so you have 2 units each measuring 7" x 14"


3. Cut each unit in half horizontally, so you have 4 units each measuring 7" square and then the fun begins.


Putting the block together:


1. There are a variety of different ways these blocks can go together, have fun and experiment to find a layout you like and then sew the rows together.


2. This is the one I went with, the feature fabrics will stand out more due to the borders around them, which is what I was after for this particular block.


Repeat to make as many blocks as you need for your quilt. I intend to have 4 rows of 4 so will need 16 blocks, this will give me a finished quilt of 54" square.

Tuesday, 14 October 2014

AROUND THE WORLD BLOG HOP.....

The Makings of An Autumn Triple Star!!

I have been tagged in the Around the Blog World by my fellow Bee member Pam, over on Sewing Wilde all the way from Western New York. If you haven't yet seen Pam's blog make sure you check it out, she has some wonderful tutorials on there and many inspirational projects to keep you entertained over these horrid cold evenings!!

As I didn't get any responses back from the people around the world I asked if I could tag, I am going to have to bully my quilting bestie Kerry Q into it, since I know she has some fab projects on the go right now....she's going to kill me, so this will probably be my last post!!

Ok, here we go

1. What are you working on?

I have a few projects on the go right now, as I always do because so many things catch my eye that I simply can not focus on one project at a time, from start to finish. I have three baby quilts on the go and another one that needs starting, a really cute advent calendar (dear Lord it's almost that time again), an idea for a macho man quilt and a multitude of Bee Blocks.
This month is the turn of the lovely Gemma, who is currently suffering from baby brain, to be Queen Bee. She chose the Triple Star as her block and sent out a fab array of reds, beiges and browns for us to use.


Once I had cut down the fabrics to the sizes and shapes that were needed, each beige square had to be sewn to a red or brown square depending on where in the star it was going, thus forming a multitude of half square triangles....


The squares then need to be trimmed down and sewn together in order to build up each section, eventually forming the points of the stars.


2. How does my work differ from others?

It is entirely made up of fabrics, colors and patterns that I like, even if I am making it for someone else!?! I have to say I am not very good at following a pattern, I do tend to start at the bit I like the most, even if it is in the middle or in fact the end of the instructions. And try as I might I simply can not move away from turquoise! So you will know it is my work because without fail there will be some turquoise in there somewhere....even if it is pink and girly!

3. Why do I do what I do?

To stop myself from going completely mad, to hide away from the rest of life which isn't always very nice! I just love to be creative and make things, I have a real disease when it comes to fabric, so really quilting is just a disguise. I enjoy the challenges quilting presents, although I don't always come off the better for it!

4. How does my creative process work?

It's very simple really, I find something that makes me go "ooooooooooooo" and I go from there, it could be a pattern or design, a color palette, a piece of fabric or collection of fabrics or a person or occasion. I think the most important thing is to be inspired by what you are doing, to have something constantly on your mind that you just can't wait to carry on with or develop further.
Usually my process starts with finding "that" fabric.....you know the one!


Happy Quilting
Kerry xx


Monday, 21 July 2014

BLOG HOPPING!!

Hello From Kerry Q

This week on the blog a post from the lovely Kerry Q about her Quilting Bee shinanigans!! She is such a talented little monkey, I can't tell you how lucky I feel to have found such a wonderful friend who is as loony and addicted to fabric as I am!! Enjoy.........


All of Kerry-Leigh's quilting bee adventures have inspired me to get involved as well, so in May I joined a 'Modern Bee', UK Hive 2! My group of ladies are spread across the UK from Wales to Leeds, and we kicked off our Bee in June with 'Mosaic Tiles' for Amie.


This was a lovely easy block to start with, it went together in about an hour and a half despite me making a few mistakes (mental note to self to read instructions more carefully in future!). Amie chose midnight blue for her background which she supplied and asked for aqua, yellow and red for the squares. As you can see Amie is going to have a very striking quilt!


This month was Carol's turn, who chose 'Bluebell's Cabin' and had no specific requirements beyond a 'scrappy look'. Eeeeek! As anyone who knows me will tell you, I am pretty obsessed with colour co-ordination so 'scrappy' was quite a challenge for me!


After much searching through my stash I managed to narrow it down to two focus fabrics -the liberty style purple flowers and the blue thistle print. Partly because I wasn't sure how to go about creating a 'scrappy' effect, and partly because I just couldn't help myself (!) I then picked out other toning scraps from my stash, trying to include light, medium and dark shades to balance the block.


Now I am slightly obsessed with log cabin, so I was really looking forward to making these blocks - and they didn't disappoint! They went together so quickly, perfect, if like me you're all about instant gratification when quilting!


Below are the finished results. I'm not sure how 'scrappy' the overall effect is, but I am pleased with them, so hopefully Carol will like them too!


Thanks for stopping by and reading my post. I'd love to know how you go about creating a scrappy effect, so please share any hints and tips you have!

Kerry Q xx


Wednesday, 2 July 2014

BEE-UTIFUL STACKED WINDMILLS

Tricky Business....


This block is fast becoming a favourite in the Quilting Bee community, so far it is the most popular block to be chosen in both of my current Quilting Bees, bringing my total made to 4!! I do love making this block and each time seeing the differences that fabric choices and placements can make.

First up was "Radiant Orchid", Pantone's colour of the year and Rachel's colour choice of the month, the rest was completely up to our own imagination and creativity....pink, grey and floral what's not to love??


I had a few hiccups with the centre of this one, trying to get those blessed points to match up, hence the unpicked stitches....grrrrrrrrr


But I got there in the end. So feeling confident and some what pleased with myself I thought well why not crack on with the other one?? If I had known how much this second one was going to misbehave I would have invested in a good bottle (or 3) of Rose before I started. 

The recipient of this block sent across her own instructions and asked that we use those instead of the book, she sent very clear links to various websites, which were easy to navigate, but for some reason I just could not get on with this one.


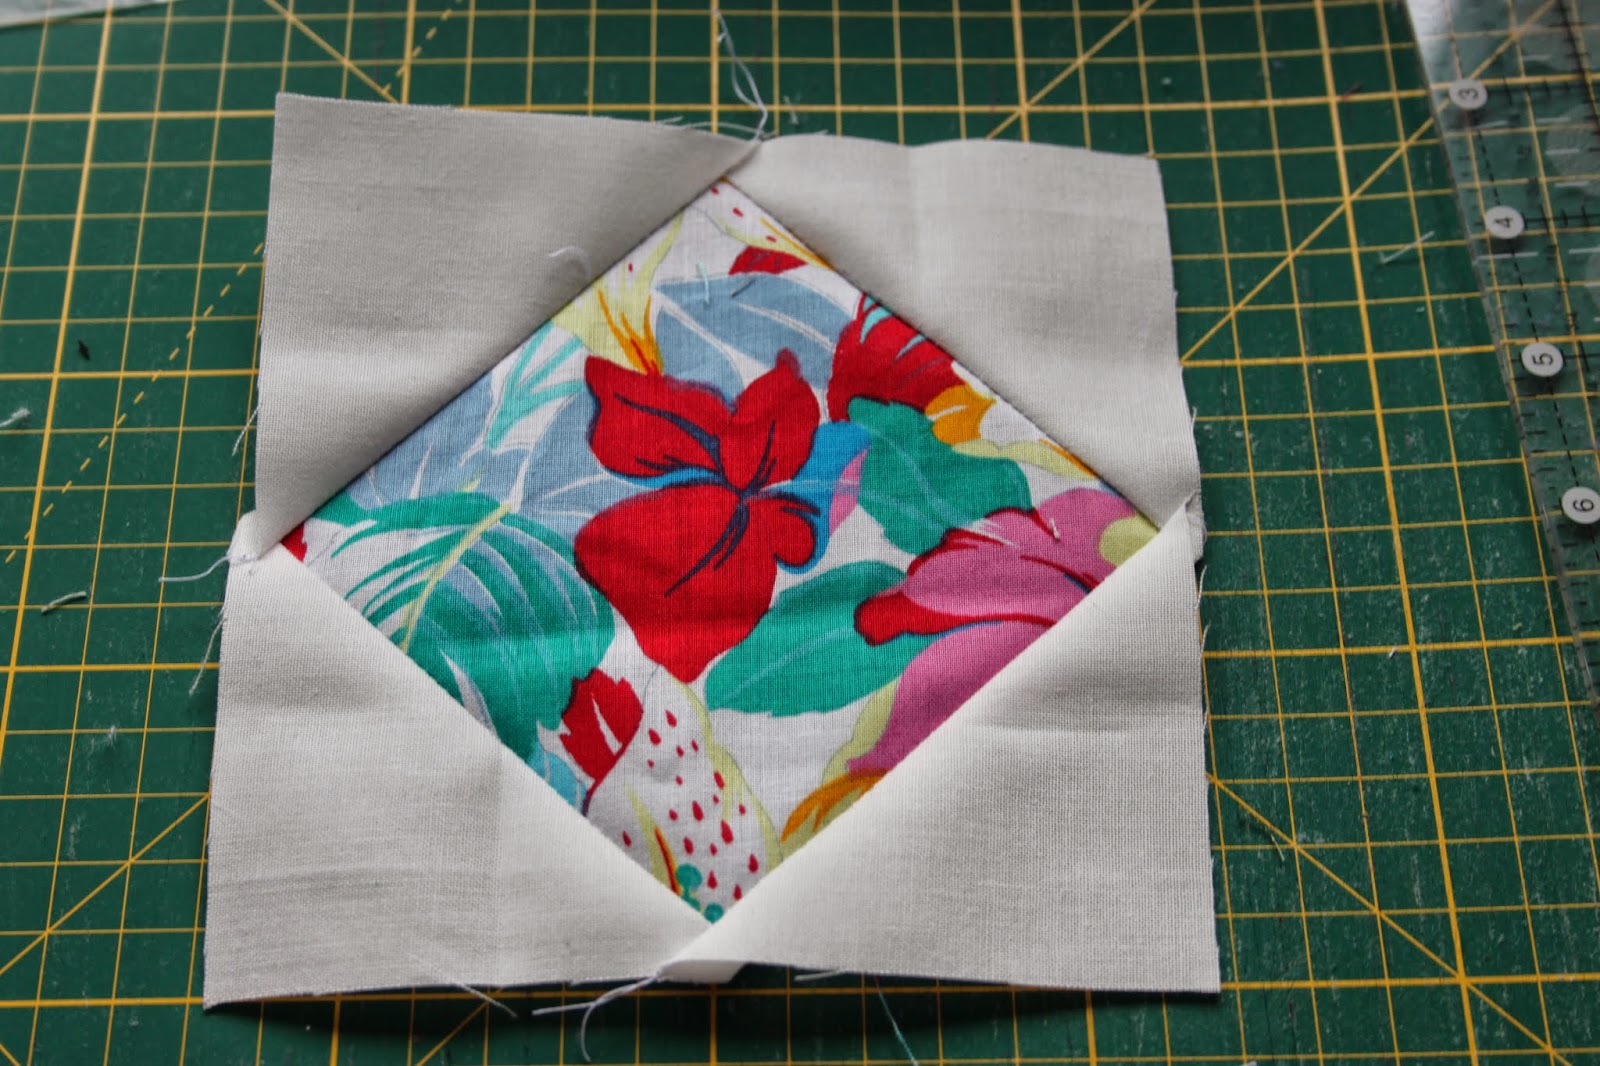
A square within a square...simple enough concept, cut a big square, cut four smaller squares, sew them in the corners cut off the excess leaving 1/4 seam allowance. I could get this far then all sense appeared to leave me....


I managed to do this 3 times!!!! Before sense found me again


A multitude of half square triangles, colourful language, blue smoke and wasted fabric later things were starting to take shape


I played around with a couple of colours for the 'center ring', originally I had florals but it was just to much, a darker blue really changed the whole look of the block and wasn't what Isobel was after so in the end I decided on the very pale green with a subtle leaf design. This is the end result an English Summer Garden for a very worthy cause, the intended friend this quilt is going to recently lost her husband to tragic circumstance, hopefully this quilt that Isobel is putting together will go a little way to making her feel better.


Something else I really enjoy about creating the same block is fabric choice and placements, in both blocks I used Robert Kaufman Modern Bliss in grey you can buy yours here, it really is such a great fabric to work with and so very versatile as well. It lifted up the pale florals in the English Garden block, yet made the bright pink pop in Radiant Orchid! You may have noticed that I have also been using it in some of the blocks I have done for the Nautical Quilt.

As always we love to hear from you, please leave us comments or email us with your thoughts, feedback and guidance.

Happy Quilting
Kerry xx


Sunday, 8 June 2014

A TALE OF TWO SEAGULLS

2 Seagulls and a Lighthouse


It really has been an age since I have sat down and updated you on my shinanigans, whilst I may have been scarce I really have not been idol!! In fact this very morning I very nearly murdered 2 seagulls.....


I have had a project in mind for quite some time now and have actively been looking for patterns, ideas and inspiration on how to bring this together and move it forward. It had to be a nautical theme and have a fairly muted blue/grey/navy/ palette with maybe a few splashes of red, yellow and white thrown in for good measure.


If you are a regular follower/reader you will know how much I LOVE foundation piecing, I will use it wherever I can!! So when I cam across these patterns I just couldn't resist, it was almost to good to be true. These blessed seagulls soon became the bane of my life!! But I persisted and persisted and persisted... you get the idea. I really had trouble with these ones, I stitched them backwards, upside down, wrong way round and unpicked them more times than I care to admit and in the end one of them I am sure came out looking a bit drunk BUT I did them!


So many of the pieces were rather tiny which was a new challenge for me and whilst these blocks could do with a tidy up I am really proud of them!! 
Then I thought well they weren't that bad really so why not try something even more fiddley with even tinier pieces?? I mean who wouldn't think that right?? Bring on the Lighthouse....


I loved sewing this block, the instructions were really clear and it actually came together rather quickly, which is something I like, each section had enough going on to give a real sense of progress and achievement even though it didn't take long to sew up. The overall effect was really impressive, a block I thought would look good in this quilt has now become one of my favorites and I've found that now I am almost 'building' the rest of the quilt around it.


I have now reached over 2000 views of the blog, thank you so much to all of your for helping me make this dream a reality!! Don't forget you can follow me on various websites to make sure you always know when there has been an update!

Happy Quilting
Kerry xx


Thursday, 22 May 2014

NEW YORK BEAUTIES

Triangles, Points and Piecing


It's no secret I spend hours and hours of my life on Pinterest, I mean who needs to iron and dust? Honestly?! It was on one of these 'research' afternoons that I stumbled across a picture of an amazing quilt, it really was just so beautiful I had to investigate further!! Enter Karen K. Stone!! 


The image I found was in fact the cover of Karen's wonderful book Karen K. Stone Quilts, which can be found at many great book stores and quilting suppliers, so can her program for EQ7 as it happens!! The title of the quilt is Cinco de Mayo and I am sure you will agree its just beautiful!!


So with no further ado I decided to drive myself even more crazy with these tiny little pieces of fabric and fiddly little paper sections and embark on a New York Beautie of my own!!! I still have a veeeeeeeery loooooong way to go and so far the design I have chosen is quite simple BUT I am really happy with it so far!

I have a real thing for batiks, so I decided to indulge myself here a little and only use them for this quilt.


The next step is of course to cut out all the tiny pieces of fabric, as this is a foundation pieced quilt they don't have to be very accurate and they can mostly be cut from scraps which is fab because not much fabric is needed. Each section is sewn separately and then sewn together in sections, making a stack of squares!!


The individual squares can then be placed in a multitude of ways to create really eye catching designs, I have been playing around with a few but haven't settled on anything just yet, I am still toying with the idea of adding in some other colors.....


It was very daunting making a start on this quilt but I have to say once I got going I found it really difficult to stop!! I am thoroughly enjoying it and now that I feel more confident I am looking forward to branching out a little and trying some more adventurous sections and borders.

Happy Quilting
Kerry xx