Disappearing Nine Patch
Disappearing Nine Patch Tutorial
These blocks work really well if there is a contrast in the colours and fabrics you choose, ideally you want to have light, medium and dark fabrics. It's ok if you don't though as it's perfect for scrap busting.
Cutting:
Square size can vary depending on the size of block and/or finished quilt you want - as long as all squares are the same size it doesn't matter. For the purpose of this tutorial, I used a couple of charm packs so my squares are 5 inches.
Cut 9 squares, each 5" x 5"
- (1) dark
- (4) medium
- (4) light
- Arrange the squares into three rows with three squares in each. Place the dark square in the block's centre position. Place the your feature fabric squares (medium) or those you wish to highlight in the block's four corners. Fill in the gaps with the remaining squares (light).
Assembly:
1. Sew the squares together using a quarter inch seam, I press my seams to the dark side, but you can do whatever you prefer, I also like to nest my seams so they lay flatter and line up perfectly.
2. If you are using 5" squares your block should measure 14" square when once the rows have been sewn together. You're then going to cut this in half vertically, so you have 2 units each measuring 7" x 14"
3. Cut each unit in half horizontally, so you have 4 units each measuring 7" square and then the fun begins.
Putting the block together:
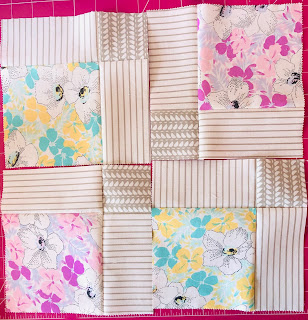
1. There are a variety of different ways these blocks can go together, have fun and experiment to find a layout you like and then sew the rows together.
2. This is the one I went with, the feature fabrics will stand out more due to the borders around them, which is what I was after for this particular block.
Repeat to make as many blocks as you need for your quilt. I intend to have 4 rows of 4 so will need 16 blocks, this will give me a finished quilt of 54" square.


